There was a requirement which says
- There are two types of users for this list Owners and Contributors/members SharePoint groups.
- Contributors SharePoint group should not have delete permissions for deleting list items permanently
- Contributors should be able to perform soft delete on the list items i.e marking an item as deleted and hiding that item from the users
- Contributors should be able to perform soft delete only on the items which are created today. They should not be able to delete items which are created in the past.
To implement the above requirement we need to create a special permission set by excluding the delete items and delete versions permissions. Now apply this permission set to the desired SharePoint group in which we are going to place all the contributors. All the users in this SharePoint group do not have permission to delete SharePoint List items. For detailed step-by-step procedure for implementing this can be found here
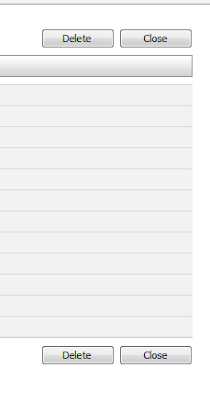
To perform soft delete on the SharePoint list items we are going to override Display Form of SharePoint list and place a Delete button beside close button as shown below. 
To override the SharePoint Display Form follow the below steps:
- Create new rendering template and please it in the ControlTemplates folder
- Override the "OnClick" event of Asp.net Button Class
- Register this template in the SharePoint custom list definition schema
Create new rendering template and please it in the ControlTemplates folder:
All the SharePoint list forms (NewForm.aspx, EditForm.aspx, DisplayForm.aspx) uses rendering template called "ListForm" which is present in the file "DefaultTemplates.ascx" in the following path.
C:\Program Files\Common Files\Microsoft Shared\Web Server Extensions\12\TEMPLATE\CONTROLTEMPLATES\DefaultTemplates.ascx
This is the code which I am referring to
<SharePoint:RenderingTemplate ID="ListForm" runat="server">
<Template>
<SPAN id='part1'>
<SharePoint:InformationBar runat="server"/>
<wssuc:ToolBar CssClass="ms-formtoolbar" id="toolBarTbltop" RightButtonSeparator=" " runat="server">
<Template_RightButtons>
<SharePoint:NextPageButton runat="server"/>
<SharePoint:SaveButton runat="server"/>
<SharePoint:GoBackButton runat="server"/>
</Template_RightButtons>
</wssuc:ToolBar>
<SharePoint:FormToolBar runat="server"/>
<TABLE class="ms-formtable" style="margin-top: 8px;" border=0 cellpadding=0 cellspacing=0 width=100%>
<SharePoint:ChangeContentType runat="server"/>
<SharePoint:FolderFormFields runat="server"/>
<SharePoint:ListFieldIterator runat="server"/>
<SharePoint:ApprovalStatus runat="server"/>
<SharePoint:FormComponent TemplateName="AttachmentRows" runat="server"/>
</TABLE>
<table cellpadding=0 cellspacing=0 width=100%>
<tr>
<td class="ms-formline">
<IMG SRC="/_layouts/images/blank.gif" width=1 height=1 alt=""></td></tr></table>
<TABLE cellpadding=0 cellspacing=0 width=100% style="padding-top: 7px">
<tr><td width=100%>
<SharePoint:ItemHiddenVersion runat="server"/>
<SharePoint:ParentInformationField runat="server"/>
<SharePoint:InitContentType runat="server"/>
<wssuc:ToolBar CssClass="ms-formtoolbar" id="toolBarTbl" RightButtonSeparator=" " runat="server">
<Template_Buttons>
<SharePoint:CreatedModifiedInfo runat="server"/>
</Template_Buttons>
<Template_RightButtons>
<SharePoint:SaveButton runat="server"/>
<SharePoint:GoBackButton runat="server"/>
</Template_RightButtons>
</wssuc:ToolBar>
</td></tr></TABLE>
</SPAN>
<SharePoint:AttachmentUpload runat="server"/>
</Template>
</SharePoint:RenderingTemplate>
If we look more closely into the above code we see the outline structure of the list form which includes Toolbar, Save Button, Cancel Button Attachments etc.. So how are the actual list data columns being generated? They get generated on the fly based in the columns in the list by one more rendering template called "ListFieldIterator" with this code of line
<SharePoint:ListFieldIterator runat="server"/>
Since we should not modify the out of box template we should create a new rendering template an user control (.ascx) file and place it in the control templates folder. Let's name the user control as "FaxLogDisplayFormTemplate.ascx". Below is the code that should be present in the FaxLogDisplayFormTemplate.ascx user control.
<%@ Control Language="C#" AutoEventWireup="false" %>
<%@ Assembly Name="Microsoft.SharePoint, Version=12.0.0.0, Culture=neutral, PublicKeyToken=71e9bce111e9429c" %>
<%@ Register TagPrefix="SharePoint" Assembly="Microsoft.SharePoint, Version=12.0.0.0, Culture=neutral, PublicKeyToken=71e9bce111e9429c" Namespace="Microsoft.SharePoint.WebControls" %>
<%@ Register TagPrefix="SPHttpUtility" Assembly="Microsoft.SharePoint, Version=12.0.0.0, Culture=neutral, PublicKeyToken=71e9bce111e9429c"
Namespace="Microsoft.SharePoint.Utilities" %>
<%@ Register TagPrefix="wssuc" TagName="ToolBar" Src="~/_controltemplates/ToolBar.ascx"
%>
<%@ Register TagPrefix="wssuc" TagName="ToolBarButton" Src="~/_controltemplates/ToolBarButton.ascx" %>
<%@ Register TagPrefix="FaxLogDeleteButton" Namespace="FaxLog" Assembly="FaxLog, Version=1.0.0.0, Culture=neutral, PublicKeyToken=53432c81e5329871"%>
<sharepoint:renderingtemplate id="FaxLogDisplayForm" runat="server">
<Template>
<!-- Custom Display Form -->
<SPAN id='part1'>
<SharePoint:InformationBar runat="server"/>
<wssuc:ToolBar CssClass="ms-formtoolbar" id="toolBarTbltop" RightButtonSeparator=" " runat="server">
<Template_RightButtons>
<SharePoint:NextPageButton runat="server"/>
<FaxLogDeleteButton:FaxLogDeleteButton
class="ms-ButtonHeightWidth" ID="ButtonDeleteTop" Text="Delete" OnClientClick="return confirm('Are you sure you want to delete?')" ToolTip="ButtonDeleteTop" runat="server" />
<SharePoint:GoBackButton runat="server"/>
</Template_RightButtons>
</wssuc:ToolBar>
<SharePoint:FormToolBar runat="server"/>
<TABLE class="ms-formtable" style="margin-top: 8px;" border=0 cellpadding=0 cellspacing=0 width=100%>
<SharePoint:ChangeContentType runat="server"/>
<SharePoint:FolderFormFields runat="server"/>
<SharePoint:ListFieldIterator runat="server"/>
<SharePoint:ApprovalStatus runat="server"/>
<SharePoint:FormComponent TemplateName="AttachmentRows" runat="server"/>
</TABLE>
<table cellpadding=0 cellspacing=0 width=100%><tr>
<td class="ms-formline">
<IMG SRC="/_layouts/images/blank.gif" width=1 height=1 alt=""></td></tr></table>
<TABLE cellpadding=0 cellspacing=0 width=100% style="padding-top: 7px"><tr><td
width=100%>
<SharePoint:ItemHiddenVersion runat="server"/>
<SharePoint:ParentInformationField runat="server"/>
<SharePoint:InitContentType runat="server"/>
<wssuc:ToolBar CssClass="ms-formtoolbar" id="toolBarTbl" RightButtonSeparator=" " runat="server">
<Template_Buttons>
<SharePoint:CreatedModifiedInfo runat="server"/>
</Template_Buttons>
<Template_RightButtons>
<FaxLogDeleteButton:FaxLogDeleteButton class="ms-ButtonHeightWidth" ID="ButtonDeleteBottom" Text="Delete" OnClientClick="return confirm('Are you sure you want to delete?')" ToolTip="ButtonDeleteBottom" runat="server" />
<SharePoint:GoBackButton runat="server"/>
</Template_RightButtons>
</wssuc:ToolBar>
</td></tr></TABLE>
</SPAN>
<SharePoint:AttachmentUpload runat="server"/>
</Template>
</sharepoint:renderingtemplate>
If we observed the above highlighted code we have placed the custom delete button which we have developed beside the actual SharePoint close Button. Below shows the Delete Button code
Override the "OnClick" event of Asp.net Button Class:
using System;
using System.Collections.Generic;
using System.Linq;
using System.Text;
using System.Web.UI.WebControls;
using System.Web.UI;
using System.Web;
using Microsoft.SharePoint;
using Microsoft.SharePoint.WebControls;
namespace FaxLog
{
public class FaxLogDeleteButton : Button
{
protected override void OnClick(EventArgs e)
{
string todaysDateTemp = DateTime.Today.GetDateTimeFormats()[66];
string todaysDate = todaysDateTemp.Substring(0, todaysDateTemp.ToString().IndexOf(' ')).ToString();
SPList list = SPContext.Current.List;
string redirectURL = list.DefaultViewUrl;
int id = SPContext.Current.ItemId;
SPListItem item = SPContext.Current.ListItem;
string createdDateTemp = Convert.ToDateTime(item["Created"].ToString()).GetDateTimeFormats()[66];
string createdDate = createdDateTemp.Substring(0, createdDateTemp.ToString().IndexOf(' ')).ToString();
if (createdDate == todaysDate)
{
using (SPWeb web = SPControl.GetContextSite(Context).OpenWeb())
{
web.AllowUnsafeUpdates = false;
item["Delete Flag"] = "1";
item.Update();
web.AllowUnsafeUpdates = false;
}
}
this.Context.Response.Redirect(redirectURL);
}
}
}
Register this template in the SharePoint custom list definition schema:
Now once we complete our development we need to register this custom rendering template which we have developed in our custom list definition as follows
<XmlDocuments>
<XmlDocument NamespaceURI="http://schemas.microsoft.com/sharepoint/v3/contenttype/forms">
<FormTemplates xmlns="http://schemas.microsoft.com/sharepoint/v3/contenttype/forms"> <New>FaxLogNewForm</New>
<Display>FaxLogDisplayForm</Display>
</FormTemplates>
</XmlDocument>
</XmlDocuments>
So the final folder structure looks like this…

_526_530.jpg)
